Repurposing Pots and Pans For Household Projects: The Definitive Guide
Ever looked at a dented saucepan or a lonely lid and thought, surely this could live a second life? You're not alone. Repurposing pots and pans for household projects is one of those deceptively simple ideas that saves money, reduces waste, and--if we're honest--feels quite satisfying. The clink of solid metal, the promise of durability, the what if of creative reuse. In our experience, once you try a couple of projects, you'll start seeing possibilities everywhere. And to be fair, that's a lovely problem to have.
This comprehensive guide delivers clear, practical steps, expert tips, and UK-focused compliance insights. We'll help you turn old cookware into planters, storage, art, and more--safely and beautifully. Strong enough to hang on the wall. Good enough to show off. Let's face it: tossing good metal into the bin is a bit heartbreaking when it could be useful for decades to come.
Table of Contents
- Why This Topic Matters
- Key Benefits
- Step-by-Step Guidance
- Expert Tips
- Common Mistakes to Avoid
- Case Study or Real-World Example
- Tools, Resources & Recommendations
- Law, Compliance or Industry Standards (UK-focused)
- Checklist
- Conclusion with CTA
- FAQ
Why This Topic Matters
Repurposing pots and pans for household projects sits at the sweet spot of sustainability, design, and everyday practicality. Metal cookware--aluminium, stainless steel, copper, or cast iron--has a long service life and high embodied energy. When we throw it away before its time, we waste both the material and the energy used to make it. In the UK, local councils encourage recycling and reuse because it reduces landfill pressure and supports the circular economy. According to UK resource-efficiency guidance (think WRAP and DEFRA policy direction), extending product life is one of the most effective ways to cut household waste.
There's also a distinctly human reason. You can feel the quality in an old pot--thick walls, riveted handles, a weight that says I'll be here tomorrow. Turning that into a planter, a lamp, or a kitchen organiser makes your home feel a touch more crafted, more you. One Saturday morning in a London flat, a client told us she loved the soft ring a steel lid made when tapped--so we turned three into a minimalist wall clock. Small joys matter.
Bottom line: Repurposing cookware is good for your wallet, kinder to the environment, and genuinely fun.
Key Benefits
- Save money: Upcycling an old saucepan into a herb planter can cost pennies compared to buying new garden pots.
- Reduce waste: Reuse keeps metal out of landfill and lightens the load at Household Waste Recycling Centres.
- Design freedom: Cookware comes in classic shapes--bowls, cylinders, domed lids--that look striking when reimagined.
- Durability: Stainless steel and cast iron take a beating. They're perfect for projects that need longevity.
- Fast results: Many projects take under an hour and require only basic tools.
- Beginner friendly: With a few safety steps, repurposing pots and pans is accessible--even if you're new to DIY.
- Personal story: That old family pan becomes a memory you can see daily--maybe as a hanging planter in the kitchen window with basil. Smells good, looks better.
Step-by-Step Guidance
Below are practical, well-tested projects for repurposing pots and pans for household projects. We've grouped them by complexity and included safety tips. Pick one that fits your space--and your vibe.
1) Herb Planter from a Saucepan (Beginner)
- Clean: Degrease with warm soapy water; remove stuck-on residue. Dry thoroughly.
- Drill drainage: Using a 4-6 mm metal drill bit, drill 3-5 holes in the base. Wear eye protection.
- Add a barrier: Place a piece of mesh or coffee filter over holes to stop soil escape.
- Fill: Add a thin layer of gravel, then multipurpose compost. Plant herbs.
- Finish: If placing on a windowsill, add felt pads under the base to protect paintwork.
Micro moment: When you water it the first time, you'll notice the soft patter of droplets on metal--oddly calming on a Sunday morning.
2) Hanging Pendant Light from a Metal Colander or Pot (Intermediate)
- Choose shade: A metal colander makes a beautiful perforated pattern. A pot gives a clean, industrial look.
- Prepare: Remove handles if they're in the way; file any sharp edges smooth.
- Drill center hole: Mark the centre underneath. Use a stepped drill bit to match your pendant light fitting.
- Wire safely: Use a certified pendant kit; follow manufacturer instructions. Turn off power at the consumer unit.
- Mount: Install a ceiling hook or bracket rated for the weight. Consider a grommet to protect the wire.
Note: If you're unsure about electrical work, hire a qualified electrician. It's worth it.
3) Wall Clock from a Lid (Beginner)
- Select lid: Flat, lightweight lids with a central knob hole are perfect.
- Remove knob: Unscrew and keep the hardware--handy for other projects.
- Fit mechanism: Install a battery clock movement through the centre hole; add hands.
- Mount: Attach a small picture hanger on the back with epoxy. Let cure fully.
- Style: Add number decals or leave minimal. Both look great.
It's a ten-minute job that earns a year of compliments. Really.
4) Desk Caddy from Small Pots (Beginner)
- Group three small saucepans: Arrange in a triangle.
- Fix to a base: Screw or epoxy them onto a scrap wooden board, handles outwards.
- Use: Pens, scissors, USB sticks--the small stuff that vanishes exactly when you need it.
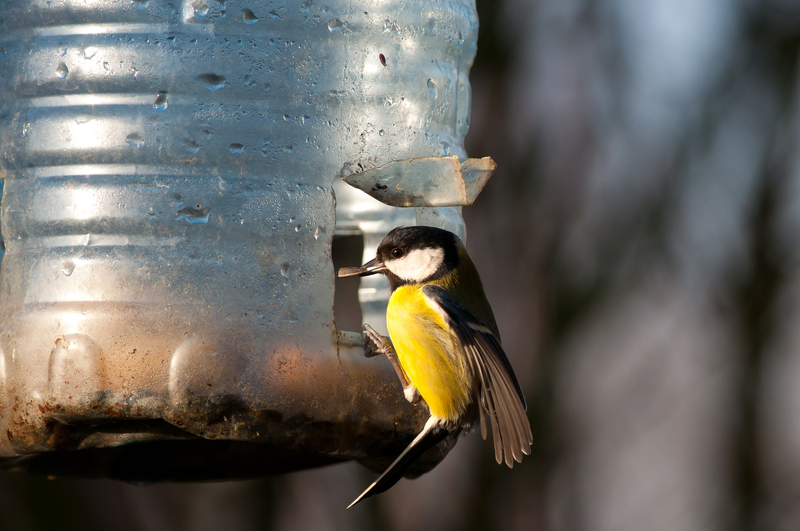
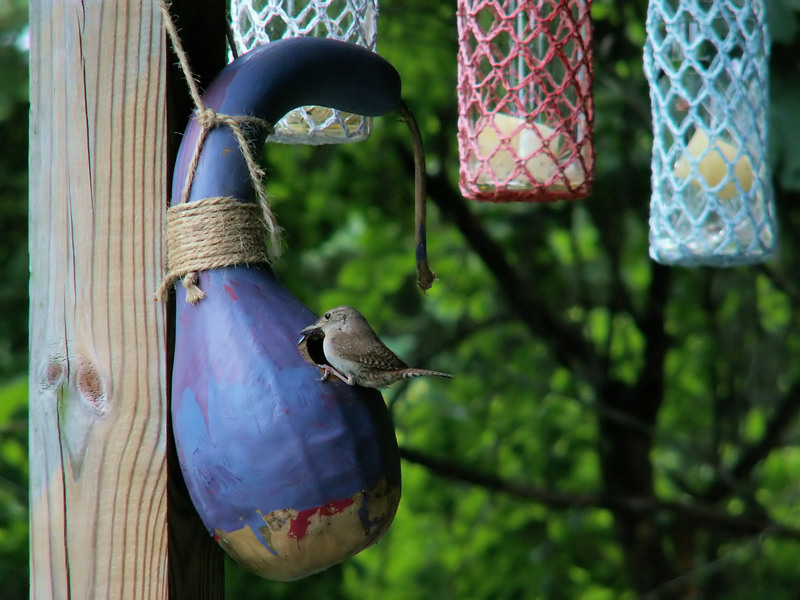
5) Bird Feeder from a Pan and Lid (Intermediate)
- Clean thoroughly: Avoid grease. Birds are fussy and rightly so.
- Drill drainage: Several 3-4 mm holes in the base.
- Assemble: Invert a lid as a roof above the pan. Use a threaded rod and nuts as the central spine.
- Hang: Suspend from a tree or bracket. Fill with seed. Enjoy the chatter.
6) Candle Mould from an Old Aluminium Pot (Intermediate)
- Prep surface: Smooth interior; wipe with a thin film of release (a drop of vegetable oil can work, or proper candle release spray).
- Set wick: Thread a wick through a small hole in the base, seal underneath with putty.
- Pour wax: Follow wax manufacturer's temperature guidance; avoid overheating.
- Cool and remove: Once set, warm the exterior slightly to release.
Fire safety: Keep candles away from flammable materials and never leave burning candles unattended. Common sense, but worth saying.
7) Garden Sieve from a Colander (Beginner)
- Strengthen handle: Wrap with cloth tape or replace with a wooden dowel.
- Use: Riddle compost, wash gravel, or rinse harvested veg. The tap water tinkling through is oddly satisfying.
8) Mud Kitchen for Kids Using Old Pots & Pans (Beginner)
- Gather cookware: Choose rounded edges, no loose flakes or sharp chips.
- Mount securely: Screw hooks to a wooden board at child height; hang pans and ladles.
- Play zone: Add a plastic basin "sink" and a pot rack. Sand down any rough wood edges.
Expect giggles, splashes, and the earthy smell of wet soil. Childhood, bottled.
9) Boot Room Drip Tray from a Large Baking Sheet or Roasting Pan (Beginner)
- Degrease: Remove residue thoroughly.
- Line: Add a silicone mat or coco liner to catch mud.
- Place by the door: Shoes stay off the floor; less mopping. Clean, clear, calm. That's the goal.
10) Hanging Planter Chain from Nested Pots (Intermediate)
- Drill three equidistant holes near each rim; deburr edges.
- Thread chain: Use S-hooks to join and suspend the set vertically.
- Plant by tiers: Trailing ivy up top, herbs in the middle, succulents low.
11) Magnetic Notice Board from a Steel Lid (Beginner)
- Check magnetism: If a magnet sticks, you're good.
- Mount: Fix a sawtooth hanger at the back; stick magnetic clips at the front.
- Use: Shopping lists, kids' drawings, polite reminders you'll ignore once then follow the second time.
12) Plant Stand from an Upside-Down Pot (Beginner)
- Stabilise: Add felt pads; if heavy, consider rubber feet.
- Seal: For outdoor use, coat with clear exterior metal lacquer.
- Top: A small wooden disk creates a neat perch for a potted fern.
Expert Tips
- Know your metals: Stainless steel resists rust; aluminium is light and easy to drill; cast iron is heavy and needs rust-proofing; copper looks stunning but scratches easily. Use a magnet test: if it sticks, it's likely steel.
- PTFE/non-stick (Teflon) caution: Avoid sanding or overheating non-stick coatings. If the coating is heavily scratched or flaking, treat it as decorative-only, not for food, and work in a ventilated area when drilling.
- Edge safety: After cutting or drilling, deburr edges with a file. A quick pass prevents nasty surprises.
- Primers matter: For painting metal, use a rust-inhibiting primer first, then enamel or metal-specific paint. Light coats, patience, better finish.
- Adhesive choices: Epoxy for strong metal-to-metal bonds; silicone sealant where flexibility helps (planter drainage seals); contact adhesive for fabrics or cork liners.
- Outdoor protection: Clear lacquer or exterior paint reduces corrosion. Reapply annually if the British weather goes to town on it.
- Noise control: Stick felt pads under metal items to protect surfaces and reduce that clatter that wakes the whole house at 6am.
- Weight checks: Cast iron planters and lamp shades can be heavy. Use wall plugs, anchors, and fixings rated well above the load.
- Measure twice: Pots are curved; marking holes in a triangle keeps things even. Use masking tape as a drilling guide.
- Think sets: Three matching pans becomes a design feature. Repetition looks intentional--and a bit posh.
Small aside: You'll forget primer once, paint will chip, and you'll sigh. Yeah, we've all been there.
Common Mistakes to Avoid
- Skipping cleaning: Paint or epoxy won't stick to grease. Degrease first, always.
- Overheating non-stick: PTFE breaks down at high temps; don't torch or burn non-stick pans for any project. Just don't.
- Ignoring drainage: Planters without holes drown roots. Add holes and a gravel layer.
- Using weak fixings: Heavy metal needs serious anchors. Match fixings to wall type (brick vs plasterboard).
- Forgetting PPE: Drilling metal throws sharp swarf. Wear eye protection and gloves.
- Mixing food and craft surfaces: Once you paint or use industrial adhesives, don't revert that pot to food use.
- Rushing cure times: Epoxy that hasn't cured is weak. Give it the full time--usually 24 hours.
- Not checking for hidden coatings: Some copper pans are tin-lined; avoid damaging the lining if you want a clean interior look.
- Misreading scale: A big lampshade in a tiny hall can look like a UFO. Measure your space. Twice.
- Skipping the plan: A quick sketch of where holes go saves you rework. Five minutes now, less swearing later.
Quick note: The do's and don'ts of recycling old cookware also apply to repurposing--clean thoroughly, prioritise safety, and dispose of hazardous coatings responsibly.
Case Study or Real-World Example
Location: Chorlton, Manchester. It was raining hard outside that day--the kind that makes the pavement shine. Inside, it smelled faintly of coffee and metal polish.
Brief: A family of four wanted to refresh their kitchen-diner with sustainable touches, using items they already owned. They had: two dented saucepans, one heavy cast-iron pot, three mismatched steel lids, and a tired roasting tray.
Plan: We proposed five projects in under six hours:
- Herb planters (two saucepans) for the south-facing window.
- Wall clock (from a lid) above the breakfast bar.
- Magnetic notice board (from a steel lid) near the fridge.
- Drip tray for muddy boots (roasting tray) by the back door.
- Cast-iron pot as a floor plant stand, inverted with a wooden disk top.
Cost: ?32 in materials (primer, enamel spray, felt pads, clock mechanism). No new furniture, no waste fees.
Results: The window herbs thrived--basil and mint--and the clock became a conversation piece at their next Sunday roast. The boot tray? It cut mopping time by half on wet school mornings. You could almost hear the sigh of relief.
Lesson learned: Start with simple projects and add one standout piece (the clock). Layering small wins builds momentum and keeps the budget friendly.
Tools, Resources & Recommendations
Core tools:
- Electric drill with metal bits (3-10 mm) and a stepped bit for lamp holes
- Metal file and deburring tool
- Screwdrivers, pliers, adjustable spanner
- Masking tape, ruler, marker
- Protective gear: safety glasses, gloves, dust mask
Consumables & finishes:
- Degreaser or sugar soap
- Rust-inhibiting metal primer and enamel or metal paint
- Epoxy adhesive and silicone sealant
- Felt pads, rubber feet, grommets
- Clock mechanism, pendant light kit (CE-marked), picture hangers
Where to source old cookware (budget-friendly):
- Charity shops and car boot sales--bargains galore, a bit of treasure hunting
- Community swap groups, Freecycle, or local marketplace listings
- Family cupboards--ask before you "borrow" Auntie's beloved copper pan, obviously
Selection guide:
- Prefer solid handles with rivets over loose screws for hanging projects
- Check for deep pitting or cracks--cosmetic blemishes are fine; structural failure is not
- Test with a magnet if you need magnetic properties for notice boards
Human note: Ever tried clearing a room and found yourself keeping everything "just in case"? Repurposing projects give those just-in-case items a job--and you some breathing room.
Law, Compliance or Industry Standards (UK-focused)
Repurposing pots and pans for household projects intersects with a few practical UK regulations and safety standards. While most home projects are exempt from formal approvals, it's wise--and responsible--to follow good practice.
- Household metal recycling and reuse: Local councils support reuse and recycling under the Waste Framework Directive principles. If you decide not to repurpose, take old cookware to your local Household Waste Recycling Centre; most accept metal pots and pans.
- Electrical safety for light fixtures: If converting cookware into lamps, use CE/UKCA-marked components and follow BS 7671 principles for safe electrical work in dwellings (via a competent electrician when in doubt). Always isolate power at the consumer unit before installation.
- Power tool safety: Follow HSE guidance and use PPE. Tools conforming to relevant BS EN standards (for example, BS EN 60745 for hand-held motor-operated tools) are recommended.
- Food contact materials: If you intend a repurposed item to return to food use (rare, but possible), ensure compliance with EU Regulation 1935/2004 (retained in UK law). Once painted or glued, do not use for food again.
- Non-stick coatings: Heavily damaged PTFE-coated cookware should not be heated for crafts. Avoid generating fine dust from sanding. Dispose of unusable items through appropriate metal recycling channels.
- Fire safety: Candles and electrified projects must respect basic fire safety--keep clearances, use heat-resistant materials, and never leave candles unattended. BS 5266 covers emergency lighting; while not directly applicable to a home-made pendant, it underscores fire-safe principles.
- Tenancy considerations: In rented flats, get permission before drilling ceilings/walls or hanging heavy items. Keep your deposit happy.
The Do's and Don'ts of Recycling Old Cookware (Quick UK view):
- Do: Take unusable metal pots to HWRC metal recycling.
- Do: Donate usable items to charity shops or community kitchens.
- Don't: Put large metal cookware in household recycling bins unless your council explicitly allows it.
- Don't: Bin electronics-attached cookware (like plug-in griddles) with general waste--check WEEE guidance.
Truth be told: A two-minute check on your council's website can save you a headache later.
Checklist
Before starting any project, run through this quick list:
- Purpose clear? You know exactly what you're making and where it goes.
- Condition safe? No cracks, dangerous sharp edges, or loose rivets unless you'll repair them.
- Clean and dry? Degreased and dust-free--key for paint and glue.
- Right tools? Drill bits for metal, file, PPE, fixings rated for weight.
- Surface prep? Masking tape for drill marks; primer ready if painting.
- Ventilation? If painting or using adhesives, open windows; a fan helps.
- Fixing points? Wall/ceiling anchors appropriate to the substrate (brick, plasterboard, timber).
- Final check: Will it be near children or pets? Any snag points? Smooth them now.
Take a breath. You've got this.
Conclusion with CTA
Repurposing pots and pans for household projects blends practicality with a touch of poetry. You're giving durable materials another life, shaping your home in a way that's uniquely yours, and trimming costs along the way. From herb planters that scent the kitchen to a pendant light that casts soft, dappled patterns at dusk--small transformations create daily delight.
Start simple. A lid clock, a drip tray, a single herb pot. Then build up to the showpieces. If you ever feel stuck, stand by the sink, tap the side of the pan, and listen. The answer usually turns up.
Get a free quote today and see how much you can save.
And when the room goes quiet in the evening and your new lamp throws a gentle glow, you'll feel it: you made this. That matters.
FAQ
Can I put old pots and pans in the household recycling bin?
Usually no. Most UK councils do not accept bulky metal cookware in kerbside bins. Take them to your local Household Waste Recycling Centre or scrap metal facility, or better yet--repurpose them.
Is it safe to drill holes in stainless steel cookware?
Yes, with the right tools and PPE. Use a sharp metal bit, low-to-medium drill speed, masking tape to prevent slipping, and eye protection. Deburr the holes with a file to remove sharp edges.
What paint works best on metal pots and pans?
Use a rust-inhibiting metal primer followed by enamel or metal-specific paint. For outdoor items, choose exterior-rated finishes. Apply light coats and allow proper drying time for durability.
Can I still cook with a pan after painting or gluing it for a project?
No. Once a pan has been painted, glued, or used for non-food projects, retire it permanently from food use. Keep a clear boundary between craft and kitchen safety.
Are scratched non-stick (PTFE) pans safe to repurpose?
They can be safe for decorative or non-heated projects. Avoid sanding or overheating non-stick coatings and work in a ventilated space. If the coating is flaking heavily, recycle the pan as scrap metal instead of repurposing.
How do I remove riveted handles if I want a clean look?
Drill out the rivet head with a suitable bit, supporting the pan to avoid denting. Wear eye protection and go slowly. File smooth, then prime and paint if desired. Alternatively, keep the handle and incorporate it as a hanging point.
What's the easiest beginner project for repurposing cookware?
Try a herb planter or a lid wall clock. Both require minimal tools and deliver quick, gratifying results--ideal for building confidence.
Can I turn a pot into a pendant light without an electrician?
You can assemble the shade and fit a ready-made pendant kit, but if you're unsure about wiring or ceiling fixings, hire a qualified electrician. Safety first--especially with electrics.
Will aluminium rust outdoors if I use it as a planter?
Aluminium doesn't rust like steel, but it can oxidise and dull. A clear exterior lacquer helps preserve the finish. Stainless steel resists corrosion even better; cast iron needs diligent protection.
What adhesives work best for metal-to-metal bonds?
Two-part epoxy is your best bet for strong, durable bonds. Clean and roughen surfaces lightly before application. Allow full cure time (often 24 hours) for strength.
Can I donate usable pots and pans instead of repurposing?
Absolutely. Charity shops, community kitchens, and student housing drives often welcome usable cookware. Repurposing is great--so is giving items a second life with someone who needs them.
How do I stop planters made from pots from scratching my windowsill?
Add felt pads or rubber feet to the base. You can also use a cork mat or a thin silicone liner. It protects paintwork and reduces noise when you move the planter.
Is there any health risk in using old copper pans as decor?
As decor, no significant risk--just avoid ingesting residues. If using for food again (not recommended after repurposing), copper needs a safe lining (like stainless or tin). For non-food projects, clean thoroughly and seal if needed.
What can I do with a warped baking tray?
Turn it into a boot drip tray, magnetic board (if steel), paint palette for art, or a base for organising jars in a cupboard. Warping often doesn't matter for non-cooking uses.
Ever tried making garden art with lids?
Yes--cluster three to five lids as outdoor wall art. Prime, paint, and arrange in a pattern. The slight metallic ring in a breeze feels whimsical, in a good way.
Can old cast iron be used outside?
It can, but protect it. Wire-brush any rust, apply rust converter if needed, and seal with exterior metal paint or clear coat. Raise it on rubber feet to reduce moisture contact.
What's the rough cost to repurpose a few items?
Expect ?15-?40 for paints, fixings, and small components, depending on what you already own. Many projects are nearly free if you reuse screws and offcuts lying around.
How do I know if a lid is magnetic for a notice board?
Do the magnet test--simple and reliable. If a fridge magnet sticks, it's likely steel and ready to become a magnetic board.
What if I mess up a hole placement?
It happens. You can enlarge the hole and fit a decorative washer, or rotate the pot and try again. In many designs, a small mistake simply becomes an intentional feature.
One last line, just because it's true: Making something useful with your own hands never gets old.